How to Screenshot on Mac: Capture, Save and Share
Use Command-Shift-3 for the screen, Command-Shift-4 for an area, or Command-Shift-5 for capture options. This guide follows the workflow from choosing a capture to finding, editing and sharing the saved image.
See the real background styling example and download the files
1. Capture the Entire Screen
The fastest way to screenshot everything on your display. Press and release these three keys together:
Shift + 3A thumbnail preview appears in the bottom-right corner of your screen. You can:
- Click the thumbnail to edit the screenshot with Markup (crop, annotate, draw)
- Wait a few seconds and it saves automatically to your desktop
- Drag the thumbnail directly into an app or folder that accepts images
💡 If you have multiple monitors, macOS takes a separate screenshot of each display.
2. Capture a Portion of the Screen
Need just part of the screen? Press:
Shift + 4Your cursor turns into a crosshair. Click and drag to select the area you want. Then:
- Release the mouse to take the screenshot
- Hold Space while dragging to move the selection without resizing
- Press Esc to cancel

After capturing, import your image into NexSnap to adjust its background, padding and shadow before sharing.

3. Capture a Window or Menu
To screenshot a single window with its drop shadow:
macOS automatically adds a beautiful drop shadow around the window. Hold Option while clicking to capture without the shadow. This also works for menus, the Dock, and the menu bar.
4. Use the Screenshot App (macOS Mojave+)
macOS Mojave (10.14) and later include a full screenshot toolbar with recording capabilities. Press:
Shift + 5A floating toolbar appears at the bottom of your screen with five capture modes:
Click Options in the toolbar to customize:
- Set a 5 or 10-second timer
- Change the save location (Desktop, Documents, Clipboard, etc.)
- Show or hide the mouse pointer
- Toggle the floating thumbnail preview
- On supported Mac models using macOS Tahoe 26 or later: choose SDR (PNG) or HDR (HEIF)
5. Save Screenshots to Clipboard
Want to paste a screenshot directly into Slack, Notion, or an email without cluttering your desktop? Add Control to any shortcut:
Then just ⌘V to paste wherever you need it. You can also right-click the thumbnail preview and choose "Save to Clipboard" from the context menu.
After capturing, import your image into NexSnap to adjust its background, padding and shadow before sharing.
6. Where Are Screenshots Saved?
By default, macOS saves screenshots to your Desktop with this naming format:
To change the default location, open the Screenshot toolbar (⌘⇧5), click Options, and pick a new destination. Popular choices:
- A dedicated Screenshots folder in Documents
- Your Clipboard (no file saved at all)
- iCloud Drive for automatic sync across devices
💡 Pro tip: You can also drag the floating thumbnail directly into a destination that accepts images.
7. Prepare a Screenshot for Sharing
Choose the smallest capture that explains your point. Review the image for names, account details and notifications before sharing it. For sensitive information, remove it from the source or crop it out and inspect the exported image.
Example workflow: explain a changed setting
- Capture the settings window with Command-Shift-4, then Space.
- Click the thumbnail and use Markup to add an arrow toward the changed control.
- Save the image in a project folder with a descriptive name, such as notification-setting.png.
- For a presentation, import it into NexSnap and choose a background that keeps the text readable.
A clear caption should explain the action you want the reader to take. Keep the unedited capture separately if you will need to revise the example later.
A real NexSnap example: change the background, keep the layout
These two frames come from NexSnap’s background demonstration. The same chart stays centered while the selected gradient changes. The chart’s numbers are illustrative sample data, not NexSnap customer results.
- Import a screenshot you can share. Crop private information before styling it.
- Open Backgrounds and choose a gradient. Compare a soft background with a stronger color choice.
- Keep the layout consistent while comparing: this example shows Border 50, Radius 40, Angle 0, Scale 70% and Opacity 100%.
- Use the shadow to separate the image from its background. Here it is Opacity 50%, Distance 10, Spread 1 and Radius 30.
- Check the image at its intended display size. Pick the background that supports the content, then use the share/export control.
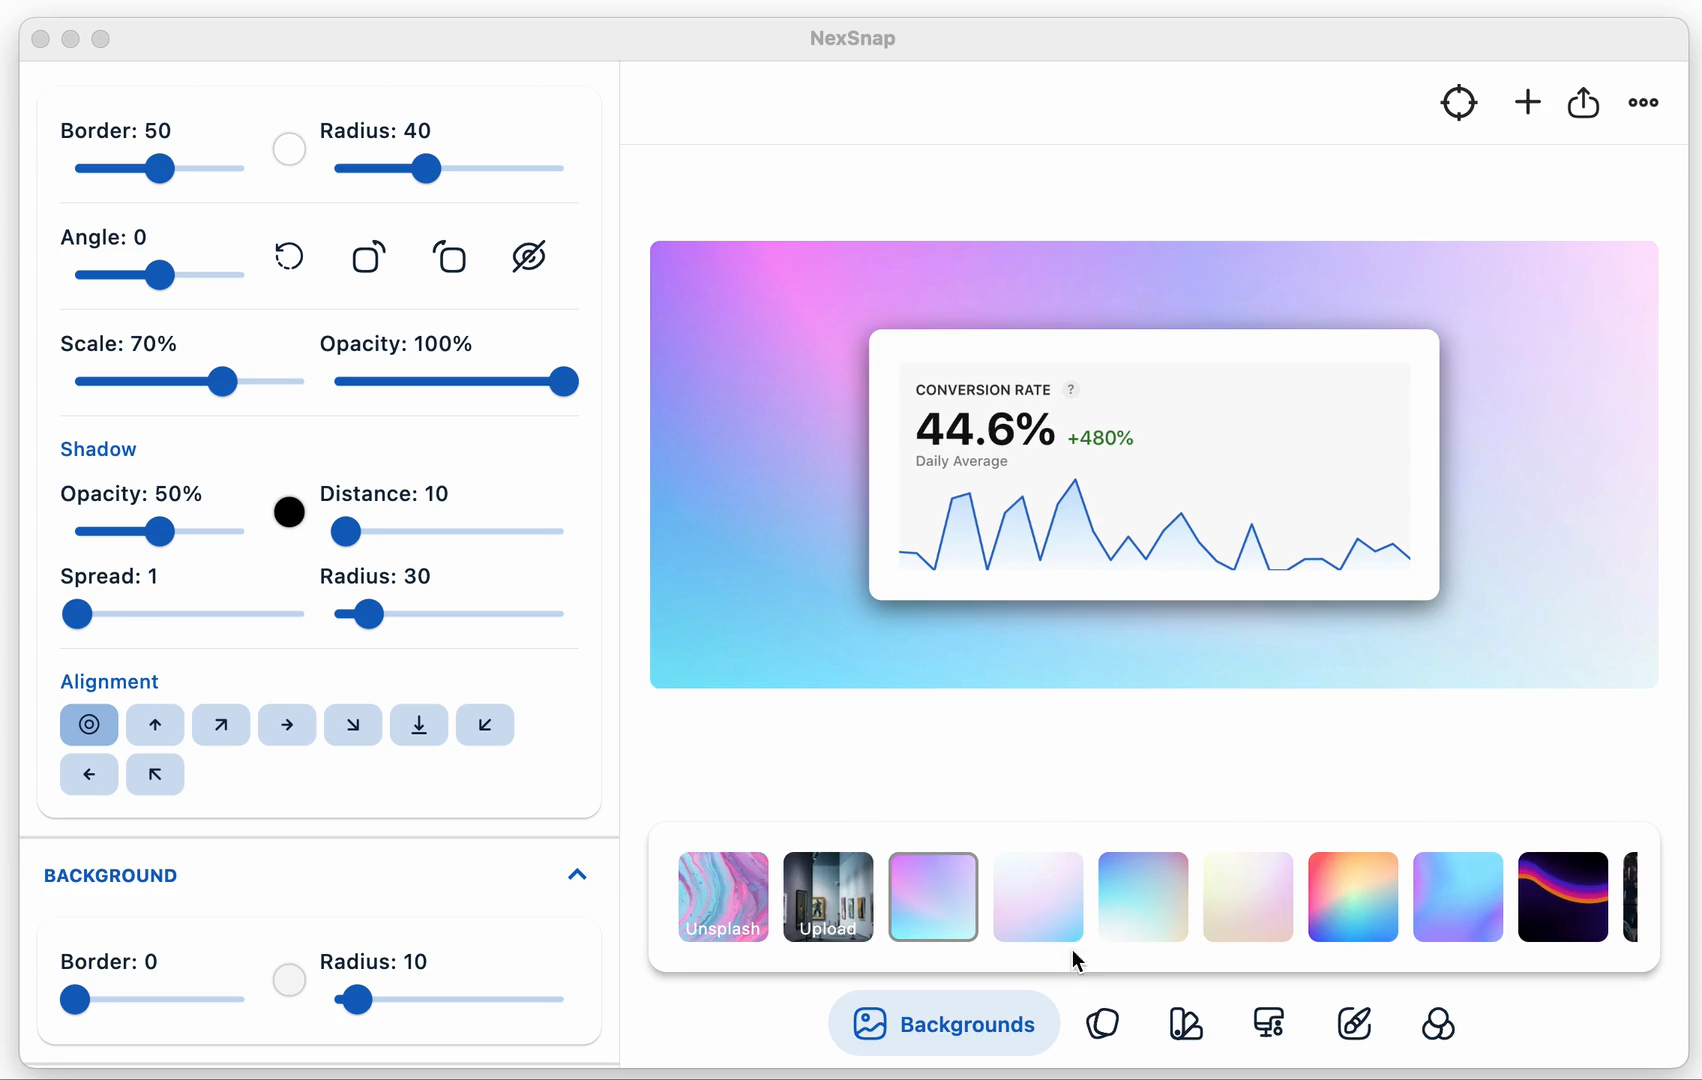
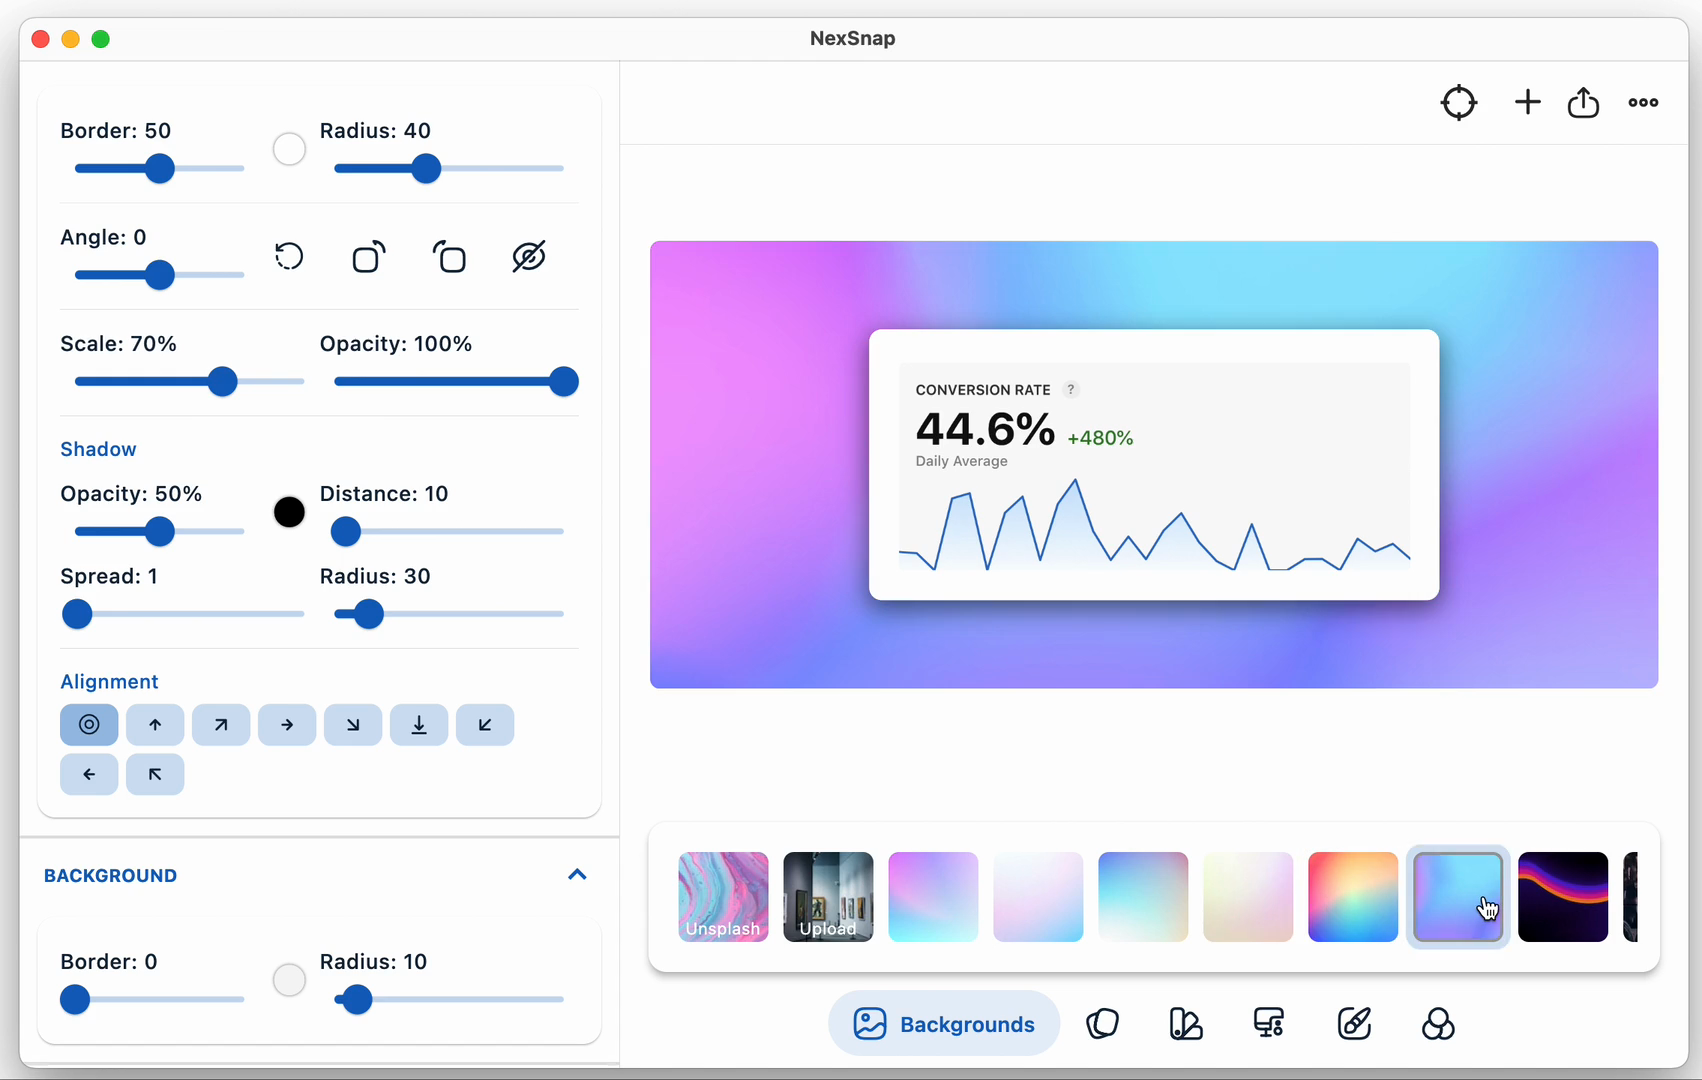
Source: NexSnap’s own background demo, frames at 0 and 4 seconds. Download the demonstration (MP4, 377 KB). Controls can vary between app versions.
Try this workflow with your own screenshot in NexSnap for Mac. The app is free to download and offers in-app purchases.
Style a Captured Screenshot with NexSnap
Background and layout controls for presentation images
NexSnap lets you place a captured image on a background, adjust its padding and shadow, and add annotations. These controls help you prepare a consistent image for a slide or product update.
Background styles
Choose gradients, wallpapers or solid colors to frame your screenshot
Mac app
Available on the Mac App Store for macOS 10.15 or later
Layout controls
Adjust padding, corner radius and shadows around your image
Annotations
Add text, arrows and step markers to explain what matters
Free download · Offers in-app purchases
Check the store for current prices and compatibility
Quick Reference: All Mac Screenshot Shortcuts
| Shortcut | Action |
|---|---|
| ⌘ ⇧ 3 | Full screen screenshot |
| ⌘ ⇧ 4 | Selected area screenshot |
| ⌘ ⇧ 4 + Space | Window or menu screenshot |
| ⌘ ⇧ 5 | Open Screenshot toolbar |
| ⌘ ⌃ ⇧ 3 | Full screen → clipboard |
| ⌘ ⌃ ⇧ 4 | Selection → clipboard |
| ⌘ ⌃ ⇧ 4 + Space | Window → clipboard |
Now you know how to capture anything on your Mac. Ready to make those screenshots unforgettable?
Sources and related guides
Instructions checked October 9, 2026 against Apple’s screenshot instructions and Mac User Guide. NexSnap features and purchases are described in its App Store listing. This guide is published by NexSnap.